Guide - How To Sew A Rolled Hem
10 October 2023Rolled hems are a fairly easy way to create small, tidy hems on lightweight fabrics. Perfect for projects such as napkin making, edging a neck-ties, and making Furoshiki fabric wraps.
Equipment Needed.
A piece of fabric approx. 50x50cm (or desired size.)
Needle & thread
Scissors
Iron
Choose Your Stitch.
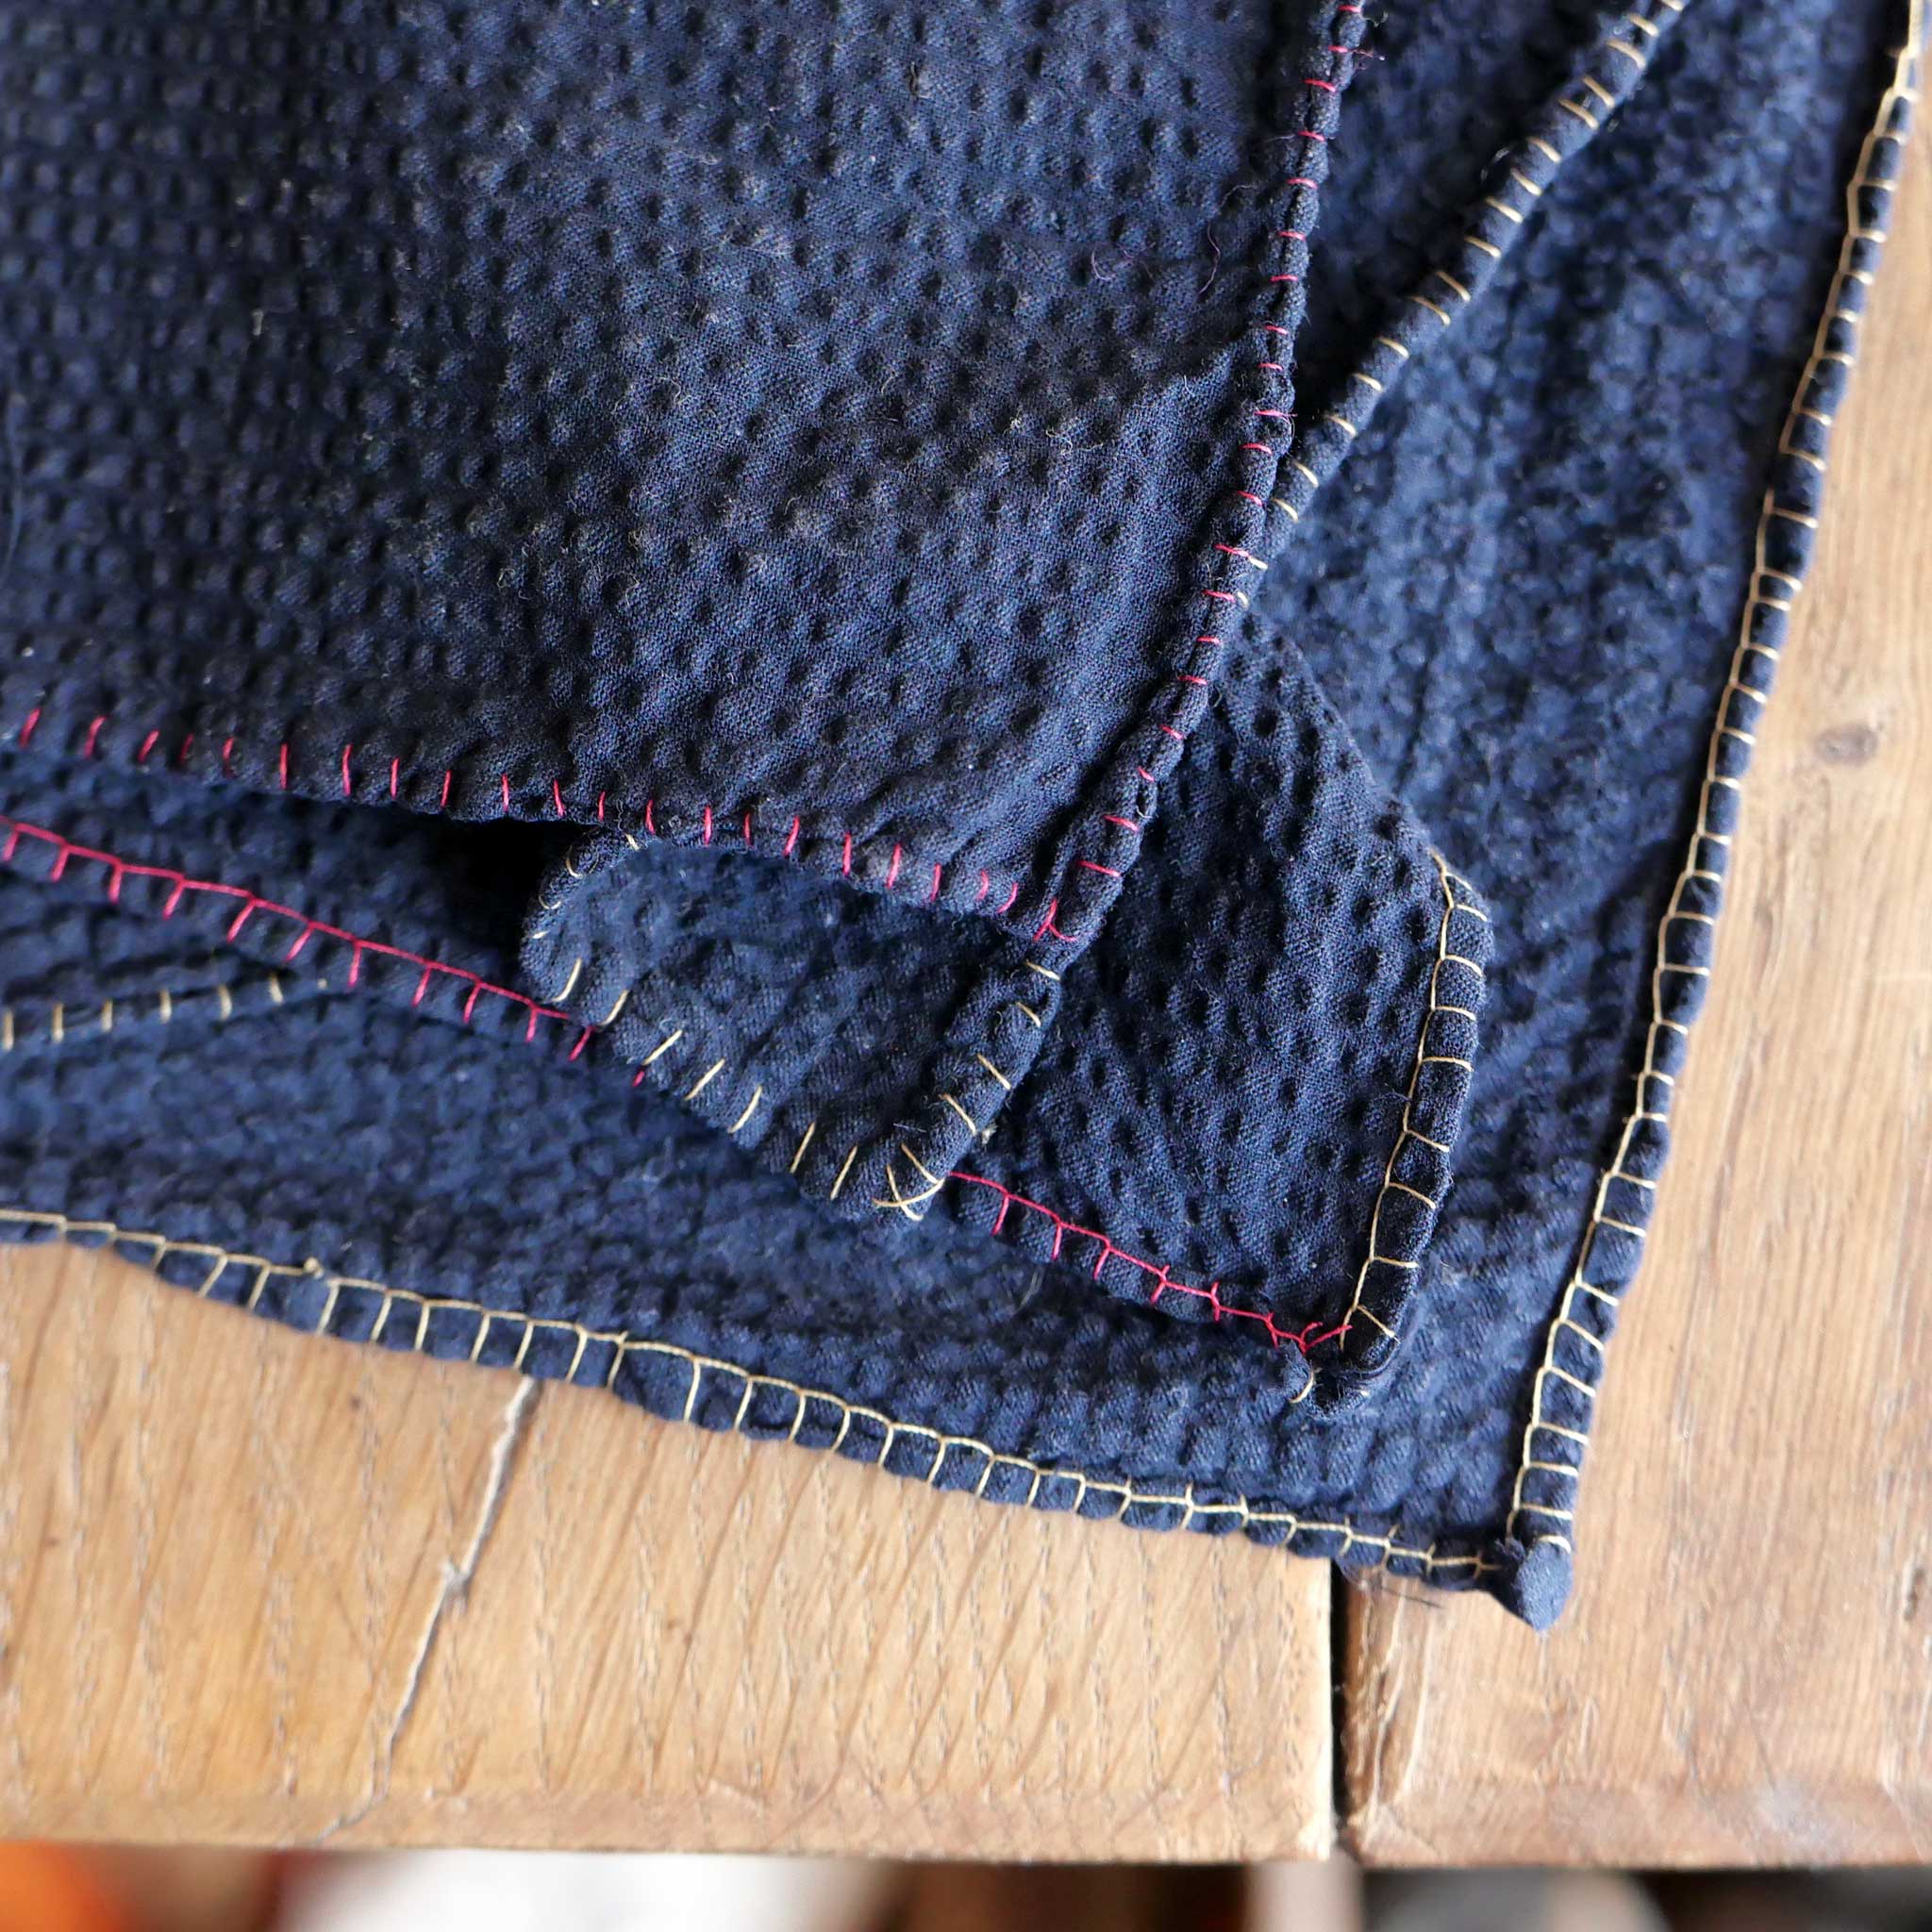
1.The Basic Rolled Hem is good for lightweight and sheer cotton fabrics and silks. This is a relatively fast and straightforward stitch.
2.The Blanket Stitch Rolled Hem is good for slightly heavier fabrics like cotton and linen. This stitch can take a bit longer but produces a lovely detail on edges, and can be sewn with a contrasting coloured thread for extra decoration.
Basic Rolled Hem
Step 1.
Lay the fabric out, fold the edges over, about 5mm in, and iron down. Thread your needle and knot the end of the thread. Starting at one corner, position your needle just under the folded hem. If you're right handed you may find stitching from the left corner to the right corner easiest.
Step 2.
Push your needle through the main fabric, from front to back. Move the needle a few millimetres along horizontally and then push the needle back through, from the back to the front, to create one horizontal stitch.

Step 3.
Now, directly above this last needle point, repeat the stitch in the same direction, making sure to only catch the folded hem and not the main square of fabric.

Step 4.
Repeat step 2 & 3 as you work along the edge of the fabric, in a crenellation shape. Every 5-10 stitches gently pull the thread taught, and this will roll the hem down.


Blanket Stitch Rolled Hem
Step 1.
Hand roll the edge of the fabric towards you, between your fingers (it helps to slightly wet your fingers.) Thread the needle and knot the end of the thread.
Step 2.
Starting at one corner, push the needle through the main fabric, from back to the front, just underneath the edge of the rolled hem.If you're right handed you may find stitching from the left corner to the right corner easiest. Whip the needle over the top edge and back through the same hole, from back to the front. This is stitch 1.

Step 3.
Whip the needle over the top edge again, move a few millimetres along in a horizontal line and push the needle back through, from back to the front, to create a diagonal stitch. As you pull the needle through, catch the first stitch, and this will turn the diagonal stitch into an 'L' shape.

Step 4.
Carry along the edge of the fabric, repeating step 3 and moving in equal increments to create a blanket detail along the edge.

You can print or download our PDF Guide to Sewing a Rolled Hem to save this for a rainy day. Your edged fabrics can be used to make Furoshiki wrapping cloths, napkins and neck-ties.